What Else?
There’s nothing else you need. But there may be other things you want to consider in order to up your home recording game.
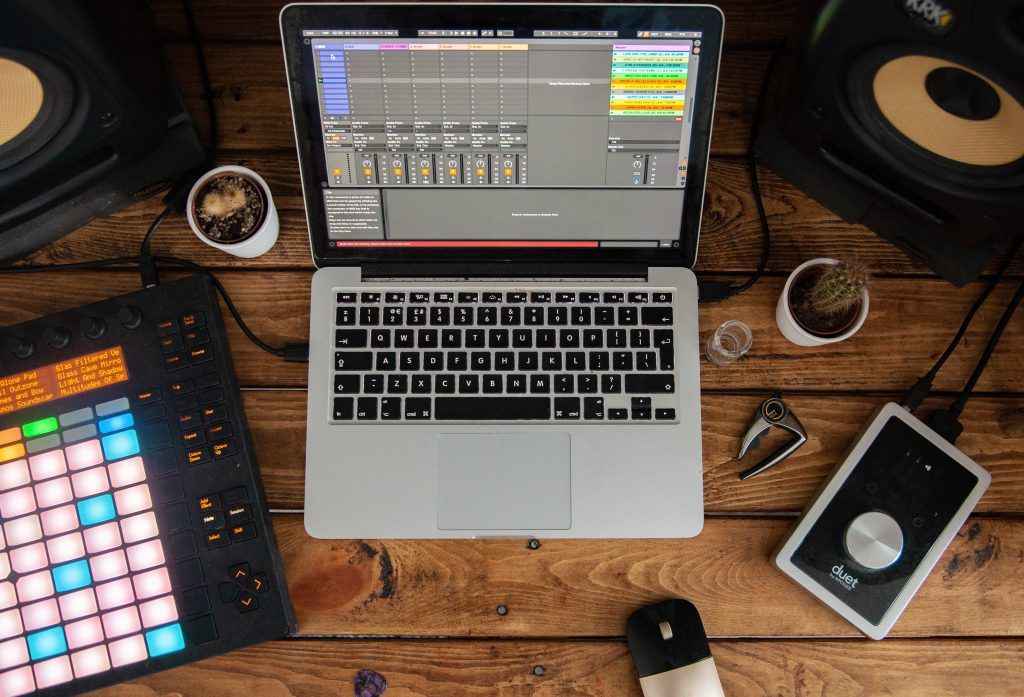
Preamps
Whenever recording an instrument (whether using a direct output or a microphone) we’re sending signal from the source to our recorder (for our purposes the recorded is whichever DAW you’re using). Sometimes that signal is weak and needs a boost. Whenever we add something along the signal path we call that a gain stage – meaning we’re adding gain, or raising the level of the signal.
Microphones tend to pick up a very weak signal, requiring a preamp – meaning an amplifier that boosts that signal before it reaches the recorder. As discussed earlier in the audio interface section, the vast majority of interfaces include built-in preamps so you don’t have to worry about getting a separate preamp.
However there are some truly extraordinary standalone preamps that sound fantastic and if you want to take your recording to that next level you can look into adding a preamp. I’m not going to get into specific recommendations here because I don’t think it’s necessary for most home-recording applications. Furthermore if you’re interested in “leveling up” you should consult a pro about your individual needs.
Acoustic Treatment for your room
You may have noticed professional studios are designed to achieve the best acoustics possible. This means absorbing or diffusing the sounds that bounce off the walls and ceilings and make their way back into the microphones to produce the best possible sound. At home we’re typically in a rectangular room with no sound treatment what-so-ever.
If you want to up your home recording game, you can look into acoustically treating your room. This means adding various acoustic treatment panels such as diffusers, absorbers, bass traps and the like. These can get expensive, and knowing what to get and where to install it in your room requires some expertise. Panel manufacturers usually have tools to help you figure out the best solution for your own room. This goes far beyond my expertise and if you’re interested in doing some acoustic treatment at your home studio, consult an expert. There’s also no shortage of articles & videos on the topic online. iZotope also offers a nice article about the basics of acoustic treatment and ways to achieve it on a low budget.
If you’re interested in acoustic treatment for you home studio, Les recommends getting Mitch Gallagher’s book Acoustic Design for the Home Studio, where he offers advice on treating your room for any budget, including tips you can implement right away at no cost.
Other Acoustic Solutions
Singers should consider a pop filter or screen. When singing or saying P or B sounds they produce bursts of air that can create unwanted pops or exaggerate those sounds when recording. A pop filter is a cheap addition to your setup that clips onto your mic stand. They’re also pretty easy to make if you’re a DIYer (click here for some suggestions).
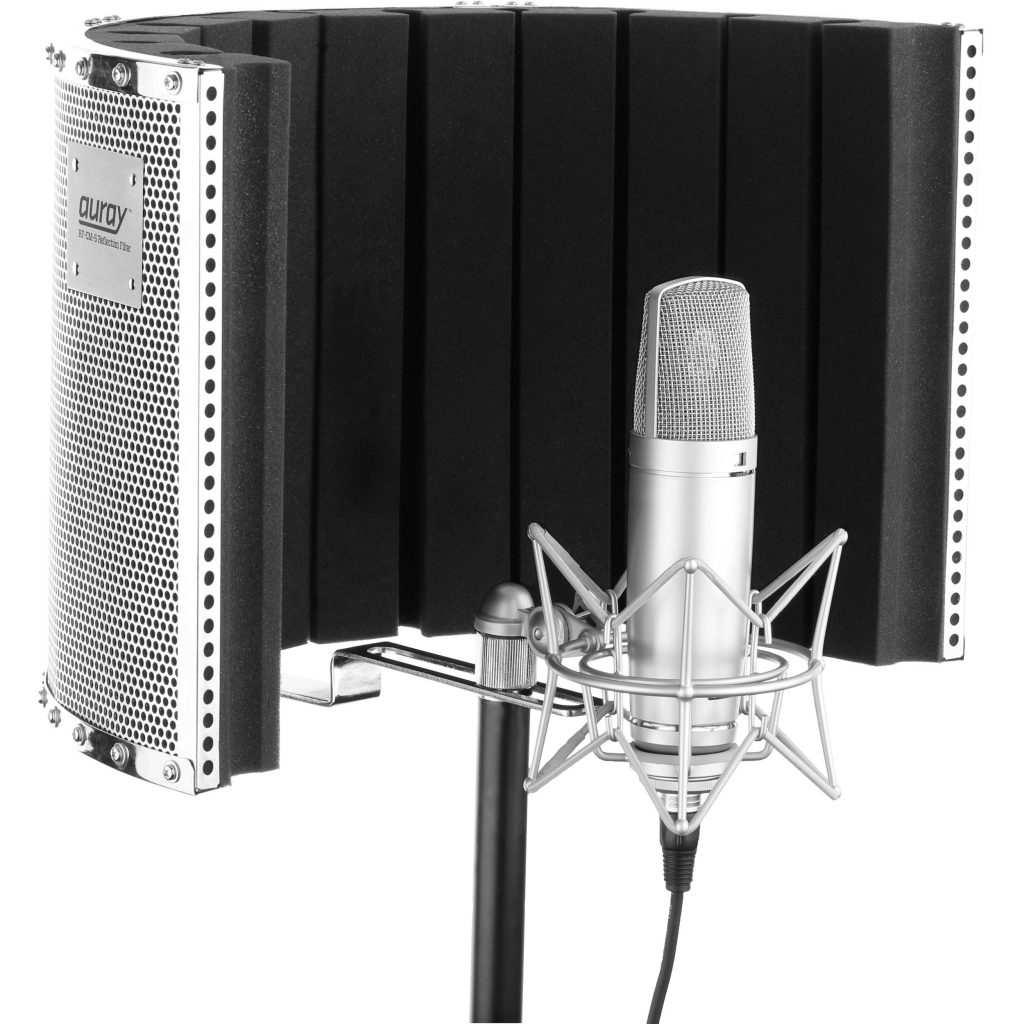
There are also a variety of other less involved solutions to help improve the acoustics of your recording space. Particularly useful for singers, a reflection shield is a relatively cheap addition to your setup. This is basically a curved reflection panel that attaches to your microphone stand.
Mic Placement
Generally speaking for the home studio you don’t want to get too close to your mic because it can sound artificial and unnatural. But at the same time the farther away your mic is from your instrument, the more room (and other) noise you’re adding to the recording. So it’s about striking the right balance.
Experiment with mic placement, sometimes moving it a couple of feet over within the space can affect the sound because of the acoustics of your room. When your’e first setting up try it in different positions and do some test recordings to find what works best for you.
Audio Levels
Just like Goldylocks and the Three Bears you want to find that sweet spot. Not too loud, not too soft. The closer your are to the mic the louder it will be. Most audio interfaces will have some control over the volume (gain) of the incoming audio signal. Most DAW meters turn yellow as they get louder and then red when things are too loud. If you’re hovering at the top of the green zone going into the yellow zone, you’re probably in great shape. If briefly tickle the red on really loud moments, you’re probably fine – but double check to make sure the sound isn’t distorting. If you have a gain adjustment on your audio interface find your desired distance from the mic and adjust the knob to get your levels.
Recording Specs
Make sure to check with your client about their audio specs. You’ll want to record at whatever sample and bit rate they are working in. Make sure to adjust those settings in your DAW before recording.
Delivering Your Files
Most likely you’ll have recorded several takes to get things sounding just right. Take some time to comp or edit those takes together to get the best possible result. Pick and choose the best phrases and stitch them together in your DAW of choice. If there are a bunch of rests between phrases, cut out those bars and create a fade out at the end of the previous phrase (after the end of the phrase) and before the beginning of the next to eliminate any unintended noises that might have been picked up during the break.
Singers, check your breaths and other mouth noises. I don’t recommend muting breaths, but if they are loud or particularly prominent you may want to consider drawing a bit of volume automation to lower how loud they are.
Once you’re happy with your recording export it as an audio file. Different DAWs do it different ways – some call it export, some call it bounce, however you do it, make sure the audio file you export always starts exactly at bar 1. Even if you’re not playing until bar 100, always export your audio beginning at bar 1. This makes it easy for the recipient to line it up when importing into their system and eliminates the possibility of lining anything up in the wrong place. And make sure you check your export settings when exporting your files. Most DAWs allow you to convert the audio to different sample & bit rates on export, you don’t want to accidentally change those settings and convert your files into a different format.
Buying Tips
I’ve included lots of links to Sweetwater.com because it’s a great online seller of music and audio gear. You can also find just about anything on Amazon.com (if you use Amazon consider using their Smile program and help raise money for your favorite charity at the same time). For used gear try ebay.com, reverb.com, craigslist or facebook marketplace. Of-course there are the brick and mortar dealers like Guitar Center, etc. where you can develop relationships with sales reps, and order things to be shipped to you.
What I like about Sweetwater.com is that you can talk to and build relationships with sales reps that can help you just as you would in a brick and mortar location. In my experience their customer service is fantastic. They also often have discounted bundles or packages – for example mic stand with XLR cable, pop filter and reflection shield. You may find savings by purchasing one of these packages instead of individual items.
Make sure you comparison shop. Like all things, different distributors may have different deals going on at different times. And here in Los Angeles if you’re purchasing gear for film/TV recording you may qualify for the post-production reduced sales tax rate. Inquire with your seller. If you need the Partial Exemption Certificate form, click here.
Conclusion
I think the most important thing you’ll need spend your money on is the microphone(s). That’ll affect the quality of your recordings more than anything else.
I hope this rundown helps you figure out what you need for your situation, what considerations to keep in mind and helps you get up and running. When in doubt, ask. Reach out to friends who have had success with their home studios, do your own online research or ask a pro.