
Working with live musicians
We all want to work with live musicians, and sadly it’s not always possible on shoestring budgets. But there are ways to get it done affordably. The key is to be resourceful and do your homework, meaning impeccable prep-work.
As mentioned above, if you play an instrument (or several), go the DIY route. Invest in a decent (or better) microphone, maybe a pre-amp and some room treatment to handle noise and record yourself playing. The next best thing is hiring individuals who can either come to your studio or record themselves remotely and send you their tracks.
Finding the right musicians can be your first challenge. Start by asking your friends. If you know someone that plays the instrument(s) you need, ask them to do you a favor and play on your soundtrack either for free or dirt cheap. If you don’t know someone that plays the instrument(s) you need, it’s time to widen your net.
Ask friends for recommendations, or use online resources. The Remote Recording Database is a great resource that I created a couple of years ago to address this exact problem. It’s free to join as a member or to search for musicians and there’s no catch, this was something I did as a way to pay-it-forward to our community. You can also go on Facebook groups and other social media and let people know what you’re looking for. If all else fails, or if you need to hire a larger group, hire a contractor. I highly recommend Gina Zimmitti.
ording Database is a great resource that I created a couple of years ago to address this exact problem. It’s free to join as a member or to search for musicians and there’s no catch, this was something I did as a way to pay-it-forward to our community. You can also go on Facebook groups and other social media and let people know what you’re looking for. If all else fails, or if you need to hire a larger group, hire a contractor. I highly recommend Gina Zimmitti.
OK, so you have your musician(s) but they need to know what to play. Make sure you prepare materials for your musicians really well. This will make a huge difference in the results you get and how quickly and efficiently you can get things done. When sending materials to someone who is remote recording themselves for you, find out their preferences in how they like their materials prepared. Do they want a ProTools session? Just WAV files or MP3s? Do they want a full mix & a mix minus, or perhaps they prefer a mix-minus and the mockup of whatever they are replacing as a separate stem. Do they want their audio with a baked in click track? Do they want a separate click track? Do they want a MIDI file? Confirm the technical specs like sample and bit rates used. Find out what they want and make sure what you give them is exactly as they’d expect, well labeled.
If you’re sending any kind of stems (i.e. a mix minus & a mockup stem of the part they’re replacing) make sure the audio files line up perfectly and are exactly the same length. For example you don’t want to have your mix minus start at bar 1, but the mockup start at bar 12, that would be confusing.
Make sure the parts look great, and match the audio perfectly. So for example, if your music starts at bar 5 but your audio file starts at bar 1, make sure your score has 4 empty bars at the front. Or conversely, don’t send audio that begins at bar 5, have it match the score, and if sending a MID file make sure it matches that, too (always starting at bar 1).
If preparing to record a group or an orchestra (in person or remotely) make sure your scores and parts look awesome. Make sure they all include the Project name, Cue number, Version number, Cue name & composer name. Create a title page for your scores and make sure the pertinent cue info makes it to each page and the parts. Don’t forget to indicate of the score is a concert score or transposed. Make sure things are laid out clearly for the conductor, use large meter changes and bar numbers on every bar. When using odd meters it’s helpful to add an indication of how they should be conducted (i.e. a 5/4 bar can be 3+2 or 2+3) See examples below (special thanks to the wonderful Ed Trybek for providing these)


Make sure your parts are as flawless as your scores. Make sure the instrument name is clearly stated on the page along with the project name and cue number & name. Make transpositions are correct, that courtesy accidentals are given when appropriate. Don’t worry about how many bars you have per staff, instead group phrases together so they are easy to follow. Make sure things are spaced out well and that everything is clear. Below is a sample violin part.

Always create tacet parts when an instrument isn’t playing. If you don’t I can guarantee when a cue is called, the folks without a part will raise their hands and say they don’t have parts, causing the conductor and everyone else to scramble to make sure the parts aren’t missing, which wastes time. If you have tacet parts, it’s crystal clear that they simply don’t play on those cues and there are no questions. If you have several instruments that are tacet on a cue it’s OK to list them all on the part and print out the exact same part for the different instruments. Here is a sample tacet part.

Great layout of score and parts makes them easier to read, which leads to better performances and less mistakes, which in turn allows you to record faster and get more done per hour. Don’t under estimate how important it is to the smooth and efficient flow of a recording session.
If you’re sending out a part for someone to remote-record, have a conversation with him/her before they record describing what your’e after. If you’re after something very particular, you may want to have a 2nd conversation once they’ve had a chance to review the materials you send them. Make sure you request several takes, so you have a few options. Discuss the possibility of them doing additional takes once you’ve had a chance to listen the tracks they send back to you and how that will affect your cost (if at all).
When planning a recording session, especially with a group, count up the actual recording minutes rather than the cue durations. It’s not unusual to have cues where several bars are MIDI only and the actual recording minutes are shorter than the cue lengths. This is important to getting an accurate minute count of what you actually need to do, and will help you plan (and budget) accordingly.
Sometimes different sections may have significantly different amount of music to record, making it more cost effective to split them up into separate sessions rather than having everyone play together. Other times you may not be able to get the best balance when they are all playing together depending on your instrumentation. For example, when working on Stargirl with Pinar Toprak, we record strings and brass separately for several reasons.
- We have a limited budget and don’t have a big enough string section to balance well against our brass section if they were in the room at the same time.
- Splitting them allows us to use smaller (and cheaper) studios that can fit each section on its own, rather than using larger stages that we would need if we had them all in the same room together.
- We typically have close to twice as many minutes of strings to record than brass. This means we can have longer string sessions and shorter brass sessions, which saves us money.
Another consideration when recording an orchestra, is splitting it up over multiple sessions into progressively smaller orchestras sizes. Inevitably, not every cue in your score will require your largest group, so reviewing your actual needs, counting up exactly how many minutes you need with which group and planning accordingly can save you a lot of money.
A few years ago I was helping produce a score where we needed to record about 60 minutes of music over 4 sessions. We had a $100,000 budget and when the contracted gave us the budget using the same orchestra for all 4 sessions we were about $10,000 over budget. I meticulously went through every cue and its orchestration and created an excel spreadsheet with a grid showing exactly which instruments were needed for which cue. This allowed me to split the sessions up into 4 different orchestra, each progressively smaller than the last. When we received the updated budget with this new plan we came in nearly $15,000 under budget! And we didn’t have to sacrifice anything, we were just being very efficient with our resources, and I had to come up with a record-order that would work.
Which brings me to the next thing when preparing to record, especially with a group. The record order can have a huge impact in how quickly things go during the sessions. I always start with an easy or moderately difficult cue that has a large dynamic range and is around 2-3 minutes long as the first cue. This lets the musicians warm up without having to jump straight into the hardest cues, and it gives the recording engineer the opportunity to adjust his/her settings on the recording. I then like to group similar style cues together because once the players are in that “mode” they automatically make adjustments from one cue to the next and things go faster than if we’re jumping around stylistically.
If there are big action cues, especially long ones, I try to schedule them for the latter part of the first hour. This way the players have had a chance to warm up and the engineer has had a chance to hone in his/her settings before they get to the hard stuff, but they’re still fresh and not tired from playing a while. It also typically means we take a break part way through recording the cue, which lets them relax and not get too tired. I will follow big action cues with easy cues to give the players a break.
If I have cues that don’t require everyone (for example if we’re doing brass and I have a few cues that require horns only) I’ll put those at the end. That way if we have to go into overtime for whatever reason, I can let most of the band go and only hang on to the few people I need, which saves money. I’m a bit anal, so I create very detailed and meticulous record orders color coding them down to the hour. Below is a sample record order from an actual session, I just renamed all the cues to keep the confidentiality of the project.

(click for a larger image)
When preparing to record live musicians, make sure your pre-record sessions are well laid out and engineer-friendly. Make a separate session for each cue. Make sure the filenames are consistent so things are sorted appropriately. Make sure your track layout is consistent, this helps the engineer quickly find his/her way around your sessions. Use consistent track names within and between sessions, and keep those names short. ProTools truncates long names, which can create a meaningless jumble of letters. Having short clear and consistent names helps.
Color code your tracks according to their groupings/stem assignments. This helps visually and it also helps the engineer if you figure this out so they don’t have to, which speeds up their work flow. Make sure to print your click track, use an unaccented Urei click sound. Make sure any 8th note subdivisions are properly printed, especially with odd meters (i.e. 7/8 clicks might be 1/4 + 1/4 + 3/8). Make sure your clicks end on the final beat of music, the musicians don’t need clicks beyond where they stop playing and this helps avoid click bleed on the ring-outs. Finally, always check your sessions against the scores and make sure everything matches. Below are some screenshots of session prep.

(click for larger image)
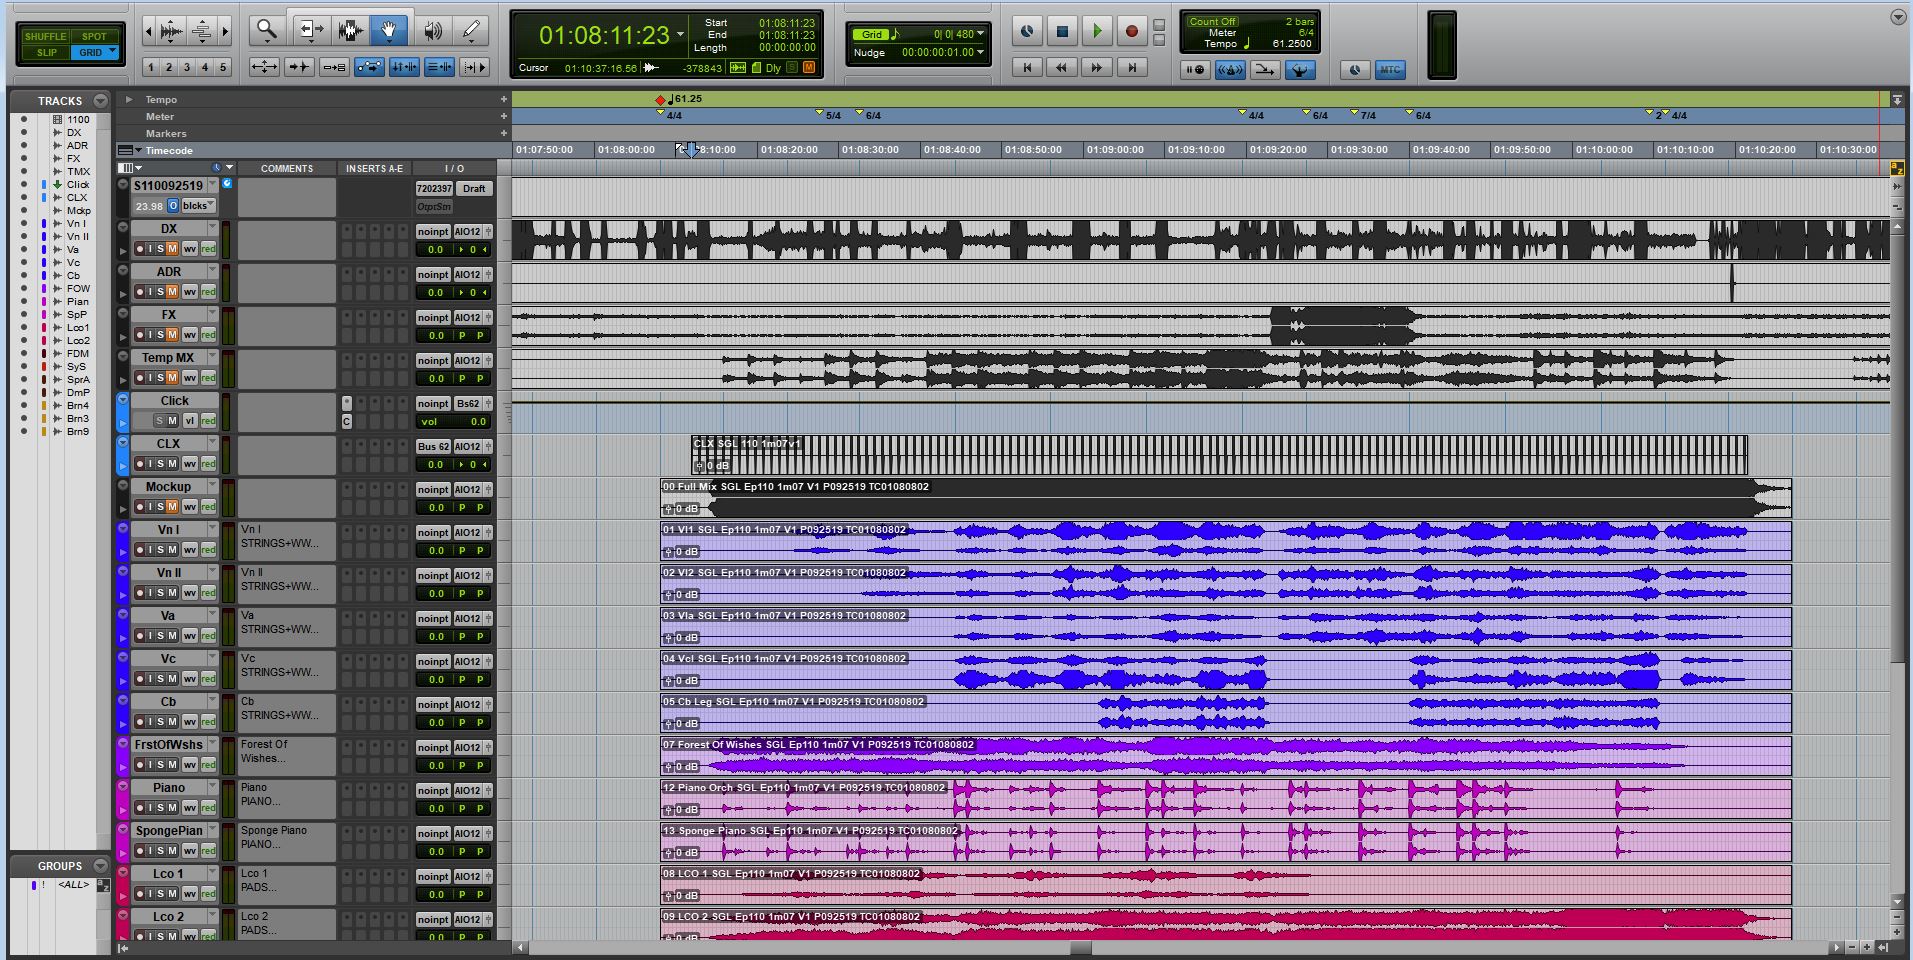
(click for a larger image)
Since I’m lazy and don’t like to have to remember things whenever I can avoid it, once I figure out my setup for a particular show, I like to take screen shots of my stems and the colors I assigned them. That way I can just look at those and know what colors to assign to which tracks. Below are my colors for my latest project as an example.


You may want to read my blog post Tips To Get The Most Of A Remote Recording Session for more information on this topic. You may also want to check out Anne-Katherine Dern’s excellent ProTools Session Prep Tutorial video, it’s great.